Pages

Wednesday, 29 November 2023

Making Terrain - My Thoughts

On a fb post I saw someone say (paraphrase) "I want to make a game table. What do I need? Where do I start? How do I make it realistic?"

While most of my terrain related posts cover what I did I thought it might be fun to summarise the process and reasoning.

[edit: Ok this is now a bloody long post. I needed to sprinkle some pics throughout as it was just a wall of text...]


Hobby
Terrain making is one of the parts of 'the hobby' I usually enjoy quite a lot.

There are many aspects to 'the hobby' which is why it's such a good one, including but not limited to;
- play mini war games with your games buddies or by yourself,
- make (build, paint, kit bash, customise, even sculpt) cool minis,
- make funky terrain and tables to play games on,
- write interesting army lists,
- write fiction is the mood takes you,
- find out about historic or real places, fantasy settings, equipment,

These are just 'broad strokes' aspects and really, if you have any shred of imagination there's something in there for just about everyone.

All of us tend to like one aspect more than others.
Some people are super competitive and want to play the games even with unpainted minis.
Some of us like seeing the painted settings and models and don't care much if we win or lose.
Some people are really into the lore of their chosen setting, others not so much.

It's all valid and amongst hobbyists I think we're usually pretty tolerant of other people's approach.  We are, after all, a fairly limited, niche community and if you're intolerant then you limit the subset of people who will interact with you.

Barely a word about terrain yet hey...


Terrain
Terrain can be anything from fully decked out, historically accurate battlefield (what I'll refer to as 'true' terrain), through to a bare kitchen table with salt and pepper shakers as structures (what I'll refer to as 'impromptu' terrain).
[More or less everything put together, or one variation.]

Personally I lean toward the former, appreciating the work gone into constructing something that visually captivates and immerses me in the game experience.  That said, I've had some incredibly satisfying games on tables that have been little more than a flat surface with wood blocks, or chopped up cardboard boxes and pine cones.
[Wood blocks. Nuf said.]

[Cardboard boxes, toilet rolls, pine codes.]

[Paper craft buildings and trees. Structures (sourced from internet) printed onto heavy gauge paper, cut out, glued together.]

In the current era there is a massive offering of stuff to buy to make a war gaming table. If you didn't want to you really don't have to paint or construct anything yourself.

Some of us like to though. Some of us don't.


So what do you actually need to make a true terrain table?
Well, as trite as this answer may feel, you need enough stuff to mimic or model actual terrain.  I'd say the 'minimum' requirements would include;
- a board cover
- structures
- terrain features
- vegetation
- scatter features

And that's pretty much it.  Some of these things may be an either/or case,  for example if you are playing on a desert or a barren moon scape then you don't need vegetation (or maybe you need alien plants),  and if you are playing in a jungle then you might need less or no structures.

It comes down to where your table is meant to represent.  Which brings up another important/obvious thing you need;  to know what/where your setting is representing. 

Human historical battles tend toward european-esque settings,  so you have open fields, forests, roads, small structures or shacks or farmhouses.

Cybrepunk battles tend toward urban areas with lots of roads, possibly blocky skyrises structures.

Your grimdark settings are 'traditionally' ruined 'gothic' or industrial structures with rubble and craters and scatter.

So you need to have an idea as to what you're building.

That said, it is possible for terrain to cross over and mix between settings.  There are no hard and fast rules, other than in my opinion - is your terrain satisfying for you to look at and/or play on.  Does it fit your mind cannon of what the setting would be like.

If you envisage a cyberpunk setting with structures covered in foliage and parks then great, aim at that.


Making Terrain
While there are a plethora of places to buy complete terrain,  the amount of 'how to' videos on the interwebs is exponentially, exponentially more (not a typo... there's that much).
 
I'm not going to be covering buying stuff as I'm more interested in the making stuff, so I thought I'd put out my ideas of the 'what do I need?' that I listed before.


IMPORTANT - Steal Ideas
An aside 'tip', here is to look at what people have already done. Take inspiration from that, steal the ideas, try to replicate what they've done, adjust to your own tastes if appropriate.

If you think it would be fun to make an 'xyz something', you're probably right, and by this stage someone else has probably had the same or similar thought.  Even if you don't find a full on tutorial you'll probably find some pictures for inspiration and something to aim at.  It often helps.

Many times I just see someone else's projects or something on a table in a battle report and think to myself, "That's cool, I should make one of those."

Ok, to the details...


Board Cover
There's no reason you can't play on the kitchen tables, but a super quick way of dropping a huge amount of immersive experience in a very simple step is to use a board cover or a 'battle mat'.

For the older, more euro-traditional of us you're basically putting a tablecloth on the table before setting the table for dinner.

A board cover is essentially just a piece of material of some type, usually 6x4' or 3x3' or whatever size battle area you're aiming for.

Ideally you want something with a pattern on the material such as grass or rubble or sandy landscape.  While you can buy pre-made board covers which have the patterns already printed on, your can also make your own and paint it yourself. It's just more work.

This is one area where I prefer the store bought.  Partially due to laziness, but to be honest I like the patterns, and the materials used, and I don't have confidence in being able to make decent ones myself.

I have about half a dozen board covers with various patterns and materials.

Common options here include;
Fleece Mats - literally a 6x4' section of fleece with a terrain pattern printed, such as though made by 'cigar box battle mat'.  These are light, strong, and if you're cold they double as a toasty cloak.
[Pic not mine (of course): straight from cigar box web site.]

Neoprene Mats - a 6x4' section of neoprene with the terrain printed, such as though made by 'deep cut studios'.
[Pic not mine: from Deep Cut Studios web site.]

Tiles Segments - these are usually 1x1' tiles that fit side by side together.  You can get these in plastic sections with features cast in,  and also mdf versions.   I don't use either of these but they're both valid options.
[Pic not mine: This is a mdf tile, painted, they normally come as raw mdf. This is from Battle Kiwi web site.]

I have noticed that although the mdf version have less features on the surface they sometimes have more options in terms of variable heights, so you might have raised sections that can be used as hills or lower sections for riverbeds etc.

[Pic not mine: These are commercial plastic cast board segments.]

A side note on mdf... If you have mdf stuff you will probably want to be modelling the basic product to some extent to avoid it looking 'stark'.  You'll be wanting to paint it anyway but hills don't have sharp edges so you might want to be rounding or filling in vertical surfaces with plaster or similar before painting.

Canvas - An option if you want to go a homemade route is to use canvas, as in painting drop cloths.  These can be painted and/or if you want to add some intrinsic texture to it then you can apply silicon sealant to the top surface and swish it around to taste.  I did this to make a section of 'river' with decent enough results.
[The river segment. Also featuring two types of roads.  A homemade 'dock' made from paddle pop sticks and mdf. And obviously my ship (99% mdf).  Re the river, you can see the silicon texture reflecting the light. Which demonstrates why it's not my favourite option for 'regular ground' as a rubbly or grass mat probably shouldn't be too shiny.]

Carpet - various carpets can be used to create high grass with very good results.  You may or may not need to paint or dye the carpet to a suitable colour.

[Pic not mine:  This shows a fairly large section of carpet that has been painted and/or dyed.  Looks awesome.]

[Pic not mine:  You can see a couple of different variants here. There's 'wheat fields' in the middle and to the right,  and 'long grass' (carpet) toward the left.]

Printed Paper - Kind of a budget option but you can find grass patterns and print them on to regular a4 sheets and tape them together. 

These all work just fine.

There are shades of nuance that might can be applicable, such as flocking the bases and modelling undulating surfaces with plaster - mainly applicable to mdf.  But most of these options above are just a matter of putting the cover down and you're done.

Another consideration is with various elevation terrain.  You might want to put i.e. a book or block of wood under the cover in order to create hills and elevation in the terrain (my local scene tends not to do this). If you do choose to do this then having flexible table covers such as fleece or neoprene or canvas may be a better option as the material is more flexible than say paper or tiles.

One last consideration for board covers is...  dice bounce.  Yep, I'm (semi-)serious. If you're rolling dice directly on the board cover then there's something satisfying about having the dice bounce nicely, rather than skidding off a flat, smooth surface.  Neoprene is my preferred option, then fleece, then others.  Very picky I know  :)


Structures
Again there are a plethora of options, and I'll try to summarise;
- Mdf kits:  Almost any architectural style you'd want is available in mdf somewhere.  Mdf kits are usually easy to assemble, requiring a bit of clean up and gluing to get your basic structure together. You can then kit bash on gubbins and widgets if you so choose.
[Early mdf kits I assembled. Note also the shrubs at the front made from kitchen scourer pads hot glued together. Note also the solid 'fences' behind them made from off cuts from the mdf sprue. Not also some crates in the background which were also mdf kits.]

[A couple of industrial/factory kits. Fills space, adds elevation, blocks line of site and adds 'zones' to the board space. Can also play 'inside' and 'outside'.]

[Some apartments n other stuff.]

- Plastic terrain kits:  There are many commercial kits available.  They tend toward the expensive size of things, but they will usually have more detail than i.e. basic mdf kits.  There are usually less options available in plastic due to it being easy to laser cut mdf, and far harder to mould plastic.
[A modal kit I found in a FLGS and picked up for very cheap, wouldn't have got it otherwise.]

- Homemade - mdf, carboard, junk: If you can cut a straight line with a box cutter then there's usually no reason you can get a sheet of 3mm mdf and make your own structures, based on existing products as a guild line perhaps.  Even easier to doing this with suitable cardboard and/or plasticard if you have access to it.
[Some small mdf residences I made relatively recently. Just mdf and glue.]

Traditionally gamers didn't have access to plastic or mdf kits like we do today, and all the really old  terrain often had drink cans, plastic bottles, paddlepop sticks and junk mixed into the structure.

[Pic not mine: drink cans used as terrain. Interestingly this combines junk with an mdf kit specifically designed to make adding the details and converting it into 'real' terrain easy.]

You can get really good results from junk, even if it's just at the 'add gubbins' stage.
And once you apply a base coat over everything you start not noticing the bottle caps and bamboo skewers as what they really are.

- Homemade - 3d Printing:  If you have one, especially one that can make larger pieces, especially filament (though you could do resin if you wanted to), then you can 3d print terrain pieces in whole or in parts.
[This is 6mm prints, assembled from standard sized segments.]

[Ruins made from the same segments, then chopped up.]

[A combination of printed segments and bottle caps/junk.]

[Requires some arts and crafts and mdf rooves though you could print those too.]


An aside...
Although I said I wasn't going in to premade terrain a lot of my recommendations and preference are toward kits and premade board covers.  This is again, partially due to laziness and partially having difficulty cutting a straight line enough to my own standards.  I have historically based much of my structures on mdf kits and then added extras or modified those to my own tastes.  I just find them easier, and they get me toward the terrain concepts I have in my head. They're not the only option, and I tend to do use various options depending on availability and how much effort I feel like putting in.


Terrain Features
Hills, cliffs, rivers, craters, roads...

This tends toward true modelling and arts and crafts.  It's easy to make hills, cliffs and craters from a big enough piece of styrofoam, and then use plaster to hide and smooth the shape.

Rivers and water features are easy to kit bash from linoleum or flexible floor tiles. Use washes to make it water themed.
[A lino lake. Note also the plain lino 'rock' sections. Also the scatter rocks and lichen (over on the left is the lichen bag... lots of it.]

You can buy river segments but they tend to have 'raised banks' at the edges, which is ok as a thing, but it's also nice to have just 'flat' pieces that can sit directly on the board.  You can always put rubble or rocks or lichen around the edges if required. 

[Pic not mine:  A fairly typical 'bought' river segment.]

Roads I've made with just segments of 3mm mdf, which is super easy.  cut some rectangles (or to taste), paint on some pva glu, sprinkly on some sand, paint, done.

You can also use rubber mats to create roads, though finding the materials is slightly trickier.  Flexible roads are nicer.
https://www.youtube.com/watch?v=7wcGD_G6xpg


Vegetation
Might of this is easier to buy and convert than start from scratch to be honest.

- Found plants:  Generally this is 'fake plants', which can be sourced from aquariums, fake plastic plants from 2 dollar shops or some hardware or homewares place. You can get larger pieces and then make multiple smaller pieces from it. Usually regular pieces are too large for gaming tables anyway. Like if you get a fake plant in a pot you'll want to ditch the pot and then make a more suitably sized/themed piece for your table.

[Pic not mine:  I think these are aquarium plants, or variations thereof. Not sure if the owner rebased them or if they're embedded in original plastic aquarium rocks.]

There are of course pieces you can buy for gaming, and these are the correct size, but tbh they're probably made from the same/similar parts by a company anyway.
You can also sometimes find 'premade' trees in other places. Our aldi shops have model trees for xmas decorations. They're a 'bottlebrush' center with plastic 'wire' foliage.  They work a treat.
[Xmas model trees,  these come in a 'snow' theme, but you can dry brush some regular green to reduce that effect.]

- Wire plants / Homemade:  Plants and trees can be made from wire. This is a fairly intense process but the results can be nice.  You get a bunch of wire strands, then twist them into a trunk and branches, attach them to a base of some type (mdf),  cover in plaster, paint and then add flock or lichen for foliage.
[Some of my favourite, homemade wire trees.  At 6mm scale but you can make them whatever size you want.]

You can again buy made pieces, stereotypically from model railway stores.  More expensive option but far easier, and the range is... somewhat limited. More limited than being able to make what you want specifically of course.  An option is to get armatures which is the trunk and branches in plastic and then add flock/foliage to taste.

I also discovered these while looking through pics, which I made an eon ago.  Just little pieces of styrofoam painted and on a bamboo skewer for a trunk.  Not as pretty as my other pieces but I still like them.


- Lichen:  This is more in the 'scatter' terrain territory.  Sourced generally from 'railway' shops (online), these are bags of dyed lichen pieces.  Usually it's spongy rather than stiff and can be used to represent shrubbery just by plopping a lump of it on the table. Super easy.  Along roads, around or next to buildings,  around the bases of trees, just clumps by itself,  it's a quick and easy gap filler.
It can also be used as mentioned for creating foliage in trees.

- Brushes and Brooms:  These are more niche pieces but broom bristles can be used to make 'swamp grass' vegetation.  Hot glue and Bristles cut to interesting sizes/clumps.

You can also use 'welcome mats' (yep, the ones you use to wipe mud off your feet at the door). to create section of long grass or 'wheat fields'.  Better for historical settings, so it's a bit more situational. And might also suit certain scales better than others.


Scatter Features
This is... well... everything else.  Crates, sandbags, rubble or ruins, boxes, fences, barricades, gates, consoles, cars n vehicles, barrels, dumpsters/bins, furniture... everything else.
Obviously you can buy lots of these things, people/companies make them.  You also sometimes get these kinds of things in starter boxes for games.
But they're also easy to arts and crafts again.  Bottle caps, matchsticks, bamboo skewers, paddle pop sticks, mdf, cardboard etc etc.
Oh, and of course 3d printing this size stuff is an option too.
Fairly generic description I know, but it's a far sweeping category.

[Some bought kit for shipping containers. These were actually 'pre-coloured'.]

[Another kit. Also pre-painted.]

[Yet another kit, this time for fences. Not painted but an easy addition.]

My collection has a wide enough range of all of the above. On the arts and crafts side of things I usually see something someone else has done and go, "I could do that."  Many cases documented within these posts.

[Pallets and industrial cable spools made from paddle pop stick.]

[Barricades made from plastic mesh filled with pebbles.]

[Sandbag stacks made from epoxy putty.]

[Scatter rocks made from pine bark.]

As per the 'Lichen' commentary above, scatter terrain fills gaps and adds interest between structures.  A board with a road and a number of large, monolithic structures can feel very bare. This feels (often) unnatural and distracts from an otherwise good attempt at making an immersive environment.  So yeah, scatter terrain is good.


How to Make it Better?
Patience, experience, develop skills.

Using my 6mm trees as example...

I started out with styrofoam chunks that were painted a single colour. These were very basic but I could at least use something for tree terrain.
After that I put in a lot more effort making the wire trees, using sprinkled flock (more or less) for the foliage.  It took a lot more effort and time to make them but the results are much better.

I didn't know what I was doing going into the project.  I did some research and then just tried it.  If I didn't like the results I could have binned it and tried again... there's no requirement for the result aside from whatever goals I have with these little projects.

Generally I didn't bin stuff outright (except when I replaced pieces with other pieces- i.e. the trees) and instead kept modifying and adjusting the project until it was 'good enough'.  It takes a bit of patience, a bit of creative thinking, sticking with it, and a willingness to try.

The more effort you put in,  the finer the level of detail you aim for in your modelling,  the better your terrain will be.


Conclusion
Terrain is good.  It doesn't have to be expensive. It doesn't have to be tricky.  You don't need to have all of it (yes, I'm trying to convince myself).  You really just need some patience, minimal talent and creativity, and to do some research to find out what you like and what you want to make.

[yeah, this is an old picture... it has grown since then. And yes, this doesn't take into account my grimdark (killteam) stuff or Epic scale (6mm) stuff. ... but, I do know I have enough terrain now :) ]

I've collect a number of different structures (mdf) sizes and styles which does make creating the basis of different environments easier, then scatter terrain to taste. But the scatter will usually stand in well across a number of different settings and if you don't have the perfect structure as per what's in your head you can usually get close enough.

Anyways, I personally enjoy the arts and crafts aspect. It's cheap, fun to make something and get a piece of whatever at the end, and it keeps me occupied.

Terrain. It's good. Go get some.


And I'll get around to fixing typos etc later.

Until next time...

Tuesday, 21 November 2023

Epic - Chaos Marines - Build - pt2

2023-11-09

Well I did the first little nibble at assembling what I've got.

Started with the bikes... first issue.  I printed 8 models.... not enough models for 8 stands.  So I need to print another 8 to do the other 4 stands.  oh well.  future project.

Then assembled the rhinos.  Easy enough, bases and the assemble.  Done.

Then desprued and based the 2 large demons.  Turned out relatively easy.  I like the size of them, they definitely work.

And that's it for now.


2023-11-10

Yesterday I did assemble all the demons onto bases. Once the basing/astrogranite is done these will look mad.

The khorne demons are bloodletters and a bloodthirster. 

The tzeentch demons are pink horrors and a flamer.

This morning I managed to shuck all the marines and clean up the bases.  So these are ready for assembly.  There's not as much variety in the model types as I'd perhaps like, but I guess I can make it work - there are seven main types including some that have only 3 or 4 models available.  Would have got more if the printer was being more consistent when I was working on these.  Oh well.

Which leaves only the Terminators left to desprue.

Little Later

yep. 'course. Tacticals on the left. havocs on the right.  commander units at the fronts.


And this is everything I've put together so far.

Still the Terminators to go before I'll need to print anything else.


Update 2023-11-12

I've got all the first batch undercoated black now.  I've used my plaster/glue mix to prefill some of the base gap where models have been glued straight onto a base, mainly demons and Terminators.

I've fired up the printer again in an attempt to crank out the needed bikes.  So far one failed print,  printed the raft and then 'printed' nothing more. Annoying.

I also ordered a 500ml bottle from monocure, so I'll get the remaining models done within a few weeks hopefully.

Theoretically I should have enough resin for the remaining bikes but it depends how many frigin' fails I get.  [rolls eyes].

+ 2 fails.

+ ...so many fails...

+ finally got enough to make up the squad.  had to chop two failures together to avoid having to do yet another failed print.  very frustrating.


Later

bikes assembled !! yhay !!

So what do I have left to print... can think it out now I have resin on the way.  Probably should get a new FEP as well to give it the best chance of working...

I turned the tub around 180o to see if that helps... kinda did maybe.   I think there's a shop nearby that allegedly has print stuff.  might drop by when the resin actually arrives.

For lists...

- Defilers  x4

- Death Wheels  x2

- Heavy Tank (Decimator)  x1

- Hell Talons  x2

- Hell Blades  x3

optional...

- Feral Titan  x1


Update 2023-11-14

Resin arrived today.  Packed the printer up this morning. Won't be starting up again.


Update 2023-11-17

Painting began... some time ago.  Got covid over the last couple of days so I'm a bit spacey.  

First poke at the quartered marines. Termis have nice big panels to get a feel for things.


Still a butt load to go. hahaha.

The two sets of chaos demons are mainly/by majority done.  A few bits of detail to do and basing obviously.


Update 2023-11-21

Just paintin' paintin' paintin'...

Pic from several painting hours ago.

Thoughts:  There has been bit of local chatter about the new Epic. Have seen some reviews and.... I don't think it's really something I'm into.

I wouldn't mind picking up the rules... just 'cos.  But not intending on getting the starter box.

Painting the new army has very much scratched whatever latent 6mm itch I must have had.  Which is cool.


Until next time...


Tuesday, 7 November 2023

Orbital Battle Command - Third Live Test Game

Had game club meet on the weekend and I was lucky to have one of my most experienced games buddies trialling the game with me.

I think the overall impression was good, and the battle was nice and quick despite learning new rules.  I lost 0:10... for what it was worth.


I pulled out several units from either side (Chaos Mix vs Tyranids) without much consideration of points.

We weren't playing specifically tactically, but my opponent quickly latched on to the concept of the Strategic Deck offering more options, both for extra card draws and for performing additional tasks. The combat resolution was also simple enough.  That it could be picked up so quickly is good proof of the concept.


He pointed out a number of 'issues' in the overall game play. These are ideas I'd also had but I'd kind of hit a wall in terms of thinking out solutions for this project and needed to take a step back from it.  Fortunately he was able to highlight them from an objective viewpoint and we workshopped them for a while.  Incredibly helpful.

- Transport are clunky, forming impenetrable roadblocks   (solution)->  reduce HP
- Transport and Vehicles shouldn't be able to sit on objectives so hard (or at all)  ->  can contest but not take objectives
- Only Infantry can take objectives. All ground units can contest objectives
- The armies rushed to the middle and sat there bashing away at each other with low tactical manoeuvring  ->  adding pushback movement when units takes damage
- Cover needs to provide a bit more... something  ->  reduces pushback
- Hold Action needs to be more worthwhile  -> remove all pins or 1 pin and add atk cards

- Draws modified to < 1 card by modifiers cannot draw from Strategic Deck [not sure about this, it can be unfair in hindsight, have left it out of rewrite but happy to discuss further]

So I have a few aspects in the rules to tweak which should elevate the game to a more tactical offering.

Do the rules serve their intended purpose? Yes.   ...but they could still do with a little refinement.


Until next time...


Friday, 3 November 2023

Epic - Chaos Marines - Build - pt1

NEW PROJECT  [only briefly reviewed and checked for typos, this is just a build brain dump]
Over the last several months I've been looking at my hobby project list. nothing super-inspiring. nothing 'required' for events coming up etc.

As I've mentioned several times I'm sure I've got on the list to print up some 'token' armies for Epic,  some 'opposing forces' if you will.  Chaos Marines, Tyranids, perhaps Dark Eldar...

I've been contemplating harder and harder the possibility and mechanics of doing the Chaos Marines list,  making lists, asking a game buddy who plays them some questions... many questions.

Over the last week I've started assembling STL files, looking for a slicer file (the file that turns STL files containing the full model into slices that the printer uses to build the physical model in resin), getting the printer out of storage etc.  it looks as though this project might be going ahead.

I've managed to avoid pouring resin and printing anything over the last couple of days.  In part because I need some supplies (gloves, paper towels, plastic bags etc).  I'm probably going to use the 1L ice cream containers for wash off.  And the amount of resin I have left is pretty low.  I would definitely need a new bottle before I can print off ALL the stuff I'd want.

As a tangible step I put together all the models I'd want for just basic 'retinue' formations of chaos space marines (equivalent of tactical marines in 'good' marines).  This is standard bolter making up the majority of the models,  then some autocannon models, and some 'leader' models.  Plus bases.

I did some remodelling in Sketchup, adding some spikes and horns and adjusting some poses, so they're different to 'regular' marines.  Not sure how noticeable this will even be at 6mm [ed: very slightly] or if it's wasted effort.  Anyway, I'll know.


Basically everything is ready to pull the trigger on these.   I guess I'll print out as much as I can with the resin I have and take it from there.  I imagine there will be a resin resupply delay.  My FLGS nearby does have resin so I might have a look at how much they want for it. Otherwise I can order some online.

I want to do some 'test runs' with the resin I have to make sure everything still works (printer, program) before getting more resin.  [ed: it does]
 
I couldn't find the original slicer program I had from before which is a little annoying (obviously I put it somewhere safe as usual).  I was able to download some programs from anycubic, but they're later iterations and do things slightly different then the one I was used to. Sigh, oh well, seems to output a file and we'll see how it goes in the test runs.


models
Part of this army list's appeal is the inclusion of chaos demons.  I'll need to model something up for those.  I really like bloodletters so I'll probably model something up for those.  Maybe some variations of other demon types. Doing the pink/blue horrors might be fun too.   See how bored I get.  [ed: i did get bored]

I'll also want to spikes and horns up some terminator models.  And create a variant or two for 'obliterators'.

Plus same deal for rhinos and land raiders  (i.e. transports for the infantry).  [ed: Didn't bothered editing rhino at all and land raiders are out]

Haven't really contemplated other things to take at this stage.  Just start with infantry, then expand out to support type units.

I might want to add bikes, havocs (devastator eq), raptors (assault eq).

I think it's fairly common practice to add a obliterator to terminator group, but this looks like it occludes them taking land raider as transports.  Land raiders as an option say 'up to four'  so there's going to be someone foot slogging. 

Oblits can teleport (as can Terminators of course) so maybe this is the only viable option. 
Dreadclaw might be an option, but requires a space craft.  Teleport is a much simpler and better option tbh.


update 2023-10-29
I managed to pick up some supplies; paper towels, plastic bags, proper gloves...  so theoretically I'm ready to go.

I have sliced up files for the tactical eq squads, (by Friday) but refrained from pulling the trigger.

I've been tinkering with the terminators which are the most obvious next step from basic infantry.

Gave them claws rather than Powerfists. Added an axe for some of them (not sure if they'll be leaders or not - chaos Terminators tend to have more weapon variation than vanilla),  added some variation to helmets and some spikes (just token, not fully spikey) etc. 


Because I can print as much as I theoretically want, my general formula is print as many squads as I'd probably want on a 'basic' list and another squad to allow for variations.  Don't have to do this for outlier squad types, but for Tacticals, Terminators etc it's a reasonable m.o.


update 2023-10-31
I now have enough 'Tactical' units made, including a squad of Havocs (devastator eq - good a FF not CC) and separate command sticks.  In terms of an army list this means I have 3 retinues and 1 havoc.

Moved on to printing Terminators, have about half the squads printed so far and trying to finish off prints for that.  Getting lots of partial (and occasionally whole) failures.

There's lots of ugly models amongst the results (missing legs or one arms etc) so I'll need to model some of the parts together anyway... blerk. 

Once those are done I'll knock out some demons and get those sorted... which theoretically is all the 'infantry' types I'll be wanting.

Need to print out bases for all the demons, all the Terminators and some of the Tacticals as well.  So still a few prints to go.

After that I'll put the print away for a while possibly.  I'll assemble the infantry and get them formed up.  Vehicles and other stuff will be a future-chris project.   Just remembered I do need some Obliterators but that's only a couple of sticks and I don't have a model for them yet.  Theoretically I could use terminators and glue on gubbins, aaaaand I discovered I have a number of vanilla terminators (and Tacticals) from old projects sitting around and available. 

My newest resin is now used up (was a bit dodgy toward the end I think).  I have gone full chaos and started trying the oldest bottle which had who knows what in it,  some funky gunk concoction of older resins possibly.  As much as it would be nice to have fresh resin this really fits the chaos theme in an amusing way.  Hoping for not too many failures as it will get unfunny fast. but I did manage to get a full print out already, so fingers (and tentacles) crossed.

later update
Got enough good Terminators done to make that 'done'.
So 3 Tacticals, 1 Havocs, 2 Terminators... good progress. 

The unknown flask for resin is turning out to be ok...ish so far.

Have some demons printing.  Only going to put 4 models on a stand which reduces numbers but we'll see how the prints go.  No point counting chickens.

The bases.  good thing about bases is they're low so they should print quite quickly.   need a bunch of batches though... oh well.


update 2023-11-02 
I'm remembering all too quickly why I needed a break from printing.  Won't go into the details but it's frustrating.  Made slow progress yesterday morning, then no progress for a while, then good progress at the end. grrr.

So i made two changes that seem to have aided progress.

i)  I now plug the usb stick into the 'motherboard' directly, as opposed to the far more convenient port on the side with a cable. Annoying because now I need to stick my fingers inside the casing which is awkward and (low) potential for electrocution, and because I need to unscrew the back panel when I want to do it. [ed: i'm just leaving it off while it's in use]

ii) I've tried the chitbox slicer with a little more enthusiasm.  I loaded it before and didn't give it much thought, preferring the anycubic option if possible.  Probably a mistake.  It appears chitubox supports earlier version proton more than anycubic does, which is incongruent and more than a little disappointing.   So yes, f anycubic, going with what actually creates a useable model.
This is still in testing phase but the results look positive. Makes an actual 'photon' type file, not a 'pws' file, the file now has a preview on the printer lcd (as it should), and the file appears to be actually printing. none of which happened with anycubic workshop.

So with that in mind.... IF the print works then i might try pressing ahead a bit further than i'd anticipated (beyond infantry).

I now have all the infantry bases done so all my infantry can be assembled. Just printing out the  Obliterators now to truly have no more left on the queue.

I also printed (successfully !!) a set of 3 rhinos from old photon files I found.  So I'm next going to try printing off all my rhino requirements (and bases).

Then I think I'll try to print out the (quite few) bikers that I need for that little squad.

For the rhinos and bikes I'm not going to chaos the models up. I just want them done at this stage.

And theoretically that's all the 'smaller' units I want.

I don't know 100% but I don't think I'm going to go the 'armoured' route (predators, vindicators, land raiders  which are all kind of... boring perhaps isn't the best word, but too close to vanilla).  It's probably going to be mainly infantry plus war engines more or less.

I do need to work out what models (/units) I actually want for the other part.

I like the idea of deathwheels, decimator heavy tanks and feral titan and perhaps defilers.

I also think I NEED to print the greater demons for the demon pool,  specifically the Lord of Change and Bloodthirster.  These are going to add punch with MW and TK so they're going to make the demons worth the effort with heavier targets.   I'll also definitely be wanting 'flamer' demons.
bloodletters/bloodthirsters as CC and flamers/lordOfChange as FF  so I'll want both so I can swap in/out if I get i.e. Eldar fing skimmers.  Theoretically I can just call the models whatever I want but it might be nice to have the right(er) models on the board. 

later update
The obliterators I sliced in chitubox actually worked!  yhay, so I technically have a way of making new files.

Going to crank out the remaining rhinos now.

Back to a original issue of having enough resin to do everything on the list... now that I've worked out the printer niggles.


update 2023-11-03
Ok. End of the day and I'm more or less out of resin. however... I did get to a result/endpoint that I'm happy enough with.

3 sets of retinues and 1 set of havocs, both with characters.  Also bases for about a third of them - mentioning them cos they used resin and a crap load of time.

2 sets of demons.
The ones at the back are bloodletters and have a Bloodthirster as their large demon.
The ones at the front are (pink) horrors (eq)  with a flamer as their large demon.
Super glad I got these done.  Mainly cos I started them and wasn't sure of a result. 

2 sets of Terminators and characters.  Or 1 boosted set and left overs (up to 6 max allowed). Also two stands of Obliterators.
Thinking now I probably could do with a 3rd stand tbh. sigh.
i'm also considering taking the 'sword terminator' i made (only 1 printed) and making that my supreme commander (with regular tactical models on the base, not all Terminators).

Finally, 1 set of bikes (8) at the back with salvaged bases.  And 10 rhinos for two Retinues and the Havocs.  Also with a stack of new bases.

Soooooo..... I think that will do me for now.

I have far fewer models left to print but they are generally bigger ones.

I'm going to put off getting another batch of resin.
Firstly, I'm done with the process.
Secondly, I have a nice batch of stuff I can process/shuck/assemble to keep busy.
Thirdly, couldn't be bothered looking it up and ordering it... but I will in time.

Can't say i really enjoyed it.  software niggles were annoying. misprints are frustrating.
I like the planning stage, and I like having them fully done and painted.  The middle however, the journey, is a bit painful.

Until next time...

Monday, 16 October 2023

Epic - Castle Assault 2023

Well, that was... exhausting.  Very enjoyable, and surprisingly I'm not entirely drained of Epic enthusiasm.

A two day event in Newcastle,  about a 2 to 3 hour drive north for me.

We had 6 tables and 12 players,  with 10k 28mm playing on the other side of the room. All the tables (terrain) were quite varied which is good, some wide open and others packed with buildings. Means that certain armies can't automatically dominate just through terrain on every table.

The event only has 5 games, with 3 on day one, and 2 on day two.  Six games is reeeeeeally overkill for my concentration.

First game was against Orks on my favourite table (a tangential WIN without even rolling a dice!).  It's the most atmospheric table.
This was against one of the top tier players (placed 3rd), and is pretty much the only way I'm going to face one of the best players... which is kinda bad because I learn a lot from playing the better guys.
Anyway I managed a 0:1 LOSS and it was a fun match. I think I might have been lucky playing him while he was still getting up to speed with the rules again  :)

Both of us were rusty on the rules, as was almost everyone at the event, but (enough) things returned surprisingly quickly.

Second game was against Knights, which I've fortunately used myself a while back, so I had an idea how they work.
The table was quite open which made it hard to hide, but basically I aimed to circle around the Knights main thrust toward my Blitz, hindering them along the way and then hitting late game from the side. 
I managed a 1:0 WIN, and again a fun match, with a number of fun confrontations on the battlefield that made it entertaining and memorable.

Third game was against Titans. Again, I've run these myself previously so I had some idea going into the match.  This wasn't a great table for hiding on for my army.
I managed a 1:0 WIN.  Kind of a tough match in so far as my marines have virtually no weapons capable of taking out the 2 Warlords (including BTS). So I aimed to peck away at the Warhounds and retain enough scrapped units to contest objectives at the end of the game.
No way was I getting BTS but I could possibly have extended the win ratio if I'd succeeded in breaking the more aggressive Warlords - sadly the dice were against me and I think I miscalculated the Damage Capacity of the unit - tried to break it off the objectives by loading it with blast markers.
But whatever, I'll take a scrappy win.

I ended up drive back to Sydney after the game, mainly because the hotel I know didn't have any rooms available.  No biggy.

Back in the morning and a bit tired.

Fourth game was against Imperial Guard and despite there being some cover I was not confident.  I have played this player and his army before and my estimate turned out to be bang on the money.
I lost my Warhound and Thunderhawk/Terminators immediately so I retired at end of turn 1.  He has massive, heavy hitting units that I have no counters for. I would just be running around the map getting killed for three more turns.
So called it a 5:0 LOSS, and we had time to relax, have a chat (the most compelling reason for going to these things anyway) and wait for the next game.  Was pretty tired so not fussed by the result.
In hindsight I could have played on and kept my BTS alive and got a 4:0 loss but pretty tired by this stage and not enthused.

Fifth game was against Eldar.  Biel Tan - I have built an army of these for myself, so I know what the units are and how they work even though I haven't used them yet.
I did manage to take out a few units quite quickly while keeping some depleted units around, so I had options even if I wasn't putting out a lot of hurt by the end of the game.
Managed a 2:2 draw, which actually turned into a Win based on the number of points killed, approximately 2200 (me) vs 1700 (him) and you need 200pt difference to pull the win.
So a minor Win but a win none the less.  I'll take it.
I got in some successful Engage actions against the tank squads which was good, even if I only thought to do it later into the game.  Was a tough but interesting match, and a good way to end the tournament.

This was my final results.  3 wins, 2 losses mainly by minor margins.  Which is probably my best tournament results to date.
I still forgot some nuance (rule) stuff but in general I think I was playing 'more advanced' than I used to - thinking about breaking units with blast markers tactically (not usually foremost in my mind as a Marines player), trying to run good Engage actions with BMs before starting (even if I didn't manage to pull any combined assaults as I'd planned) etc.

The Terminators put in some very decent work. This was the 2x Thunderhawk + Terminator setup, so they could air assault in subsequent rounds.  Potentially they get my unit of the tournament commendation.

And that was that.  This morning I added the new battle colours to the models before boxing them away for next time.  This army has been "on campaign" 4 times now which is interesting... if only to me,  haha.

Technically I was running them as 'vanilla' Codex Astartes list, not my custom Black Templar specific list this time around, but... [shrug].

Some of the models have been in all jaunts (A) like the leaders and land speeders, while the rest haven't seem much (B) or any action (C) before this trip.

Managed to place 7th of 12 players, which is a decent enough result.  All of the top 6 players are next level, with far more experience than... well, the rest of us.

I'm not suddenly enthused to start grinding Epic games/events again, but I did enjoy the games I played more than I'd anticipated.  Definitely keen to do it all again next year.  With Cancon probably not running Epic again,  CA2024 will probably be the next opportunity anyway.

Until next time... 


Sunday, 8 October 2023

Orbital Battle Command - Second Live Test Game

After the first successful test run and my picking at the rules for a couple of weeks we got in a second test game.

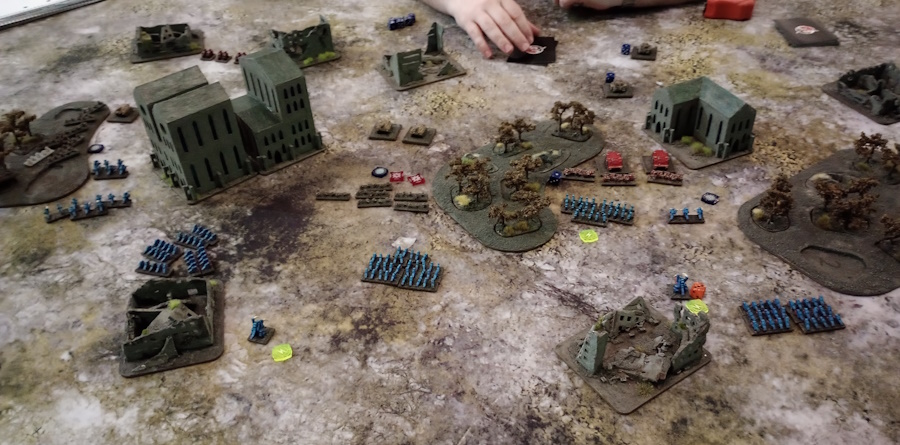
I was not lazy and brought some terrain and effects to set the scene this time round, ha.


My game buddy ran Marines and I gave the Knight Household list a run.  We were running approximately 150-200pt and about 9 units a side.  


The mid-zone ended up quite sporty with transports zipping infantry forward (as intended).  Occurred to me that the transports run not entirely dissimilar to OPR transports.  The all reds vs all blacks card packs seems to work as well (or better) than single suit.


Infantry in cover worked as anticipated. The transports are... slightly unsatisfactory.  Possibly too resilient and can just sit on an objective where they end out slapping away at each other indefinitely... so a bit boring.  Going to need to have to contemplate this a bit more.


We ended up contesting each others base objectives.  The addition of destroying enemy units counting toward VP (optional objectives) made combat feel a bit more purposeful rather than just using it to get units off objectives.

There were several decent combat points aiming at the objectives.

There are no mechanics that cause units to flee (blast markers/breaking) which means you can get damaged units to stick around which I kinda like.  It actually bugs me that soldiers conditioned to get nom'd or fight to the death just run off.  Sure they lose effectiveness (have -1 card) but where do they think they're going to go.

And in the end it was a pretty decent, interesting battle. Didn't feel particularly one-sided or that anything was particularly over powered.  Our final VP totals 6:4 with me just ahead. 

I will still need to tweak points a bit, but the mechanics of everything still worked well.

Shields and Macro were a win in my opinion.


The question now is;  what to do with the game now?  not much really. It's a purpose built project and it's kinda done.  I've made it available but it's not something that can be made 'commercial'.  Anyone who wants to give it a try... well... enjoy.   I'll keep tweaking and contemplating as is my way and just to make it as best I can, but it's eminently playable.  Cards over dice is a fantastic adjustment.


Until next time...