Monday 27 May 2019

Credibility; gone. New directions; photon

[Original draft article 2019-05-21]

So i'd decided that i'd had enough of printing a couple of months back; up to and including the point where my FDM printer is now the property of a fellow hobbiest.

A quiet paint table, i thought... no cycles of urgency to finish existing projects due to new things arriving fresh off the print tray...

Yeah, well, that lasted at least a few weeks, and --- i'm definitely playing the "i wasn't 100% health-wise" card on this one --- i ended up getting an Anycubic Photon printer.

Decisively entering the world of RESIN... finally.    The last (FDM) printer was a toss up with the Photon and the Photon lost the day... that day.


All of this is relatively old news for me. I've now had the printer (super quick postage) for a matter of days. And if you read into that that i'm planning on taking my time with the project (if not the purchase) then have some bonus points.

- - -

[Somewhat later: 2019-05-27]
The weekend came and went, and i had my first print session. Pretty much all Saturday interspersed with cleaning etc.

Whatever plans i thought i could make in advance were pretty much all wrong. Especially those involving time frames and how quickly i'd be churning out armies of resiny goodness.

That's not to say that i didn't have successes or progress;  just that there's a lot of learning to do and i'm going to have to reconsider a bunch of things. The prep work i did manage to do was all worthwhile, so yhay for that.

Here we have the very first print job underway. Way too much resin in the vat... Lesson 1.

This is the tray job complete, it contains about 1/7th of the models that i loaded onto the print job. Don't put to many thing on the tray. Lesson 2.
That said, the models that did print were generally usable, so that's a plus.

I then immediately ran the same job again, this time nothing came out at all. which i found out after an hour of wait time.
Turns out that even though the bits didn't print on the first job they still left a 'shadow' on the vat film so nothing stuck and nothing congealed. Lesson 3 - give the vat film a scrape down after each job.

I then ran another smaller batch and turned up the exposure time and got some results, but again missing models.
I then re-levelled and adjusted the build plate down further. pretty much every model printed. yhay! Lesson 4, the build plate must be right down snug on the vat film.

I tried pausing the job to see if i could see if things were looking like they'd 'caught' on the build plate, but too much goop (Lesson 4.5  just have to wait it out).

So after all these (effectively trial) runs i'd managed to produce these...
At this stage i was using the sun for curing. Does the trick, and i had my hands full to get the little uv lamp operational while working on the other processes.

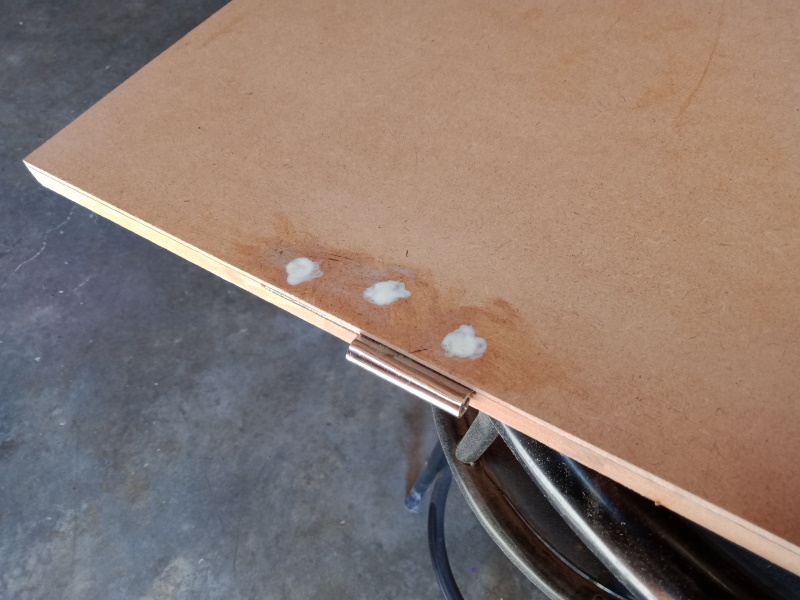
Clean up of the models was fairly easy. The dunking containers with the inserts worked a treat; scrape models off the build plate into the iso (dirty) tank (isopropyl alcohol) -> agitate -> transfer and agitate in iso (clean) tank -> transfer, rinse, swirl and spit in tap water container.   Then onto some towel to cure.  Left to cure for ages (1/2 hour) which should be way overkill.

For the final print run of the day the sun was over the horizon so i brought out the uv lamp and used that. Seemed to work ok/as anticipated.

The cleanup/reset between print jobs was far more tedious than processing the models: filtering vat resin back into the container -> wiping resin up (though i'm relatively clean so far) -> scraping the vat film -> wipe down ->  iso wipe down ->  vat back onto printer  ->  resin back in vat  ->  restart.   Bit tedious compared to FDM (scrape model off tray -> restart).
and i'm going to need more filters if this is my process. i'm considering a baking sieve/strainer and melting out any residue with iso.

So this is what i managed to churn out during day 1....
Which is a full formation and 2 sticks of 'characters'.

Only did saturday as i had stuff to do sunday... and already had burnout :)

But between now and then i kinda reconsidered my approach to the project amongst other things. primarily i'm going to go with different bases (after seeing someone else's recent efforts).

so rather than going on 40x12mm bases ('a', or pic above) i'm going to be using 32x20mm bases (b)...

this will give the models a bit more room rather than standing there like pins waiting to be bowled over. will give me a bit more room to make the basing a bit better if desired too. The tactical difference provided by 8mm rates in as DNGaF.
With that in mind i...
...managed to snap off 6 1/5 stands of models (so the old stands are toast), for reuse once i print some new bases. Tougher exercise then FDM where the models 'dig out' pretty easily. The resin shatters so it's a little messy but nothing some solid basing can't resolve.

I also noticed that some of the models were missing 'bits' such as knees and gun magazines etc... i think i'm going to need to review the model files to an extent as the project evolves. i'm still ok with this style of model which is heading slightly toward 'comic book' and i'm sure they'll look a little more up-market on bigger bases.

So yeah, learnt a lot and i'm not going to have even my first new army done anytime soon but it's vaguely on the way.


Wrap up
While... i see the potential of this medium and fully intend to follow this course and see where it leads, i can say that i experienced the same sense of... awe, or perhaps elation that i did when i churned out my first few FDM marines.

I'm still pleased with the result of course and i think the armies i'll produce will be good, better definitely, than the ones that came before; but yeah, not the same sense of wonder that i had when i first started back in... 2016.


Late Adds - 20190528
Maintaining the theme of inability to stick to my plans... bulk gloves arrived last night so i midweek printed a couple of 32x20 bases to move that task along.

My first 'official' stand... emperor's champion leading the way!!

Didn't get around to basing the other stuff... didn't get in until 'later' and it's getting a bit cold in the garage now days. Weather was windy so 'de-fumed'* things pretty well.

That was 2 print runs, at approximately 14 minutes apiece, and 5 bases each (no new dudes).

* The resin smell isn't that intense. You probably wouldn't want to be huffing it all day everyday, but in passing it's kinda noticeable but not distracting. Like... really mild exhaust fumes or when you unroll new carpet and it has 'new rubber smell' - rather than a petrol spill.  Better to keep the garage ventilated in any case.


Late Adds - 20190530

More midweek prints - it was quite windy (and cold) yesterday afternoon and evening so thought i'd try a couple of things given adequate ventilation...


Vehicles (and 32x32 bases) obviously. just went with the standard files i've been running. seems to go ok.
After that i ran a batch of infantry, using auto-generated bases and supports and also trying tilting the models. my gut tells me this ran 'better', but that could be subjective.
There's still a bit of an issue with things like gun magazines printing 'weird', not enough that you'd notice unless you were looking for it.  Overall i think the overall quality was a little higher.

re: the marshal (supreme commander) character (right-most stand) i've decided to take the banner of the old set's marshal and reuse that, mainly for nostalgia sake. it's a bit chunky but should still work. one of the guys's has a pistol and a free hand so should be able to convert him into a standard bearer, rather than having a free-standing flag like the old set.  

Lots to go.

Until next time...

Thursday 23 May 2019

Table Topper

Just a random little article.

Not a new project (Jan 2017) but one that i was happy with and thought i'd share as it may or may not be useful.

Finding a table suitable for Epic and other similar wargames isn't insanely difficult, but not everyone has a conveniently sized table available all the time (or ever).

The bigger the table the better, especially once you take into account books, dead units, tape measures, dice, gubbins, widgets and beverages.

While i do have a sturdy desk it's not quite the right size for Epic: tiny bit small.

So i made an disassemble-able table topper which covers the basic 6x4 specs.

12mm mdf sheets provide enough mass to prevent wobble, tilt, and bump unless you're a grandmaster-level klutz.

The segments are connected with 'removable hinges' for like indoor/outdoor doors. They just slide together to connect and make a solid connection. Available at i.e. bunnings for not too much, so not specialist gear.
They do create a small bump on the upper surface that is barely noticeable once you have terrain and a mat - same for the connection gaps.
Can't really recess them any further as there's not enough wood to screw them into - plenty of glue there as well. Also don't want to put them on the underside and risk scratching the table beneath. Flipping them makes the gap too big. So probably the best of a bad set of options.

Have some regular ol' towels under the boards for scratch protection etc.

Add a table cloth, some settings, dinner is served.


update 2020-07-13 (yep, that's a lot later)
I'm in a hobby lull. After finishing off interesting/taxing things i am not really in the mood to pull the trigger on anything else 'big' right at the moment.   so revisiting this project apparently.

I had had discussions with the local guys about the table topper and i had mentioned that it worked really well except for a tiny bit of lumpiness on top.

Over the last day or so i had an idea for that and it's actually coming together nicely.

The screw heads are the biggest lumps, combined with the divots for the hinges makes the whole area a little uneven.
With the mousepad (neoprene) mats you probably wouldn't even notice, but the soft fleece mats (cigar box) make the effect a little more noticeable (not that it would ruin you day by any means).

So i'm gluing a full 3mm sheet over the entirely 'top' surface. minus some holes (below) for the screw heads to recess into. 

Everything on the top surface is now flat except for 3 small holes per hinge (and gap between boards which doesn't have a noticeable effect).

Additionally, once the sheets are bonded and the edges sanded more-or-less straight i'm filling the holes with wood glue and will sand to flush once dried.
Just neatens up the whole surface and gets rid of the potential snag points.
Closer to what i had envisaged when starting out the project.


update 2020-07-15
Now filling in the divots a bit more with wood glue.

Board 1 done done. Glue dried and sanded.

Not 100% flat and smooth though i probably could add more glue... but am not going to. 

It is SUBSTANTIALLY smoother than all the hinge cut outs, so this is as good as it's going to get. Very happy with the final results.

Without a doubt the most work i have done to create a flat board.

You can get it to show the join gaps and maybe this might come out over time during a game.

quite neat...


Until next time...

Thursday 9 May 2019

Variance and Cycles, Beginnings

Been a while since the last post... been about that long since i've picked up a brush or hobby knife or glue too.

Although the paint desk is quiet i've been looking at other aspects of the hobby - specifically working on some computer related hobby stuff - an 'army builder'.
For the non-gamers; tweaking (and hopefully improving) software that allows gamers to build (Epic) armies and get a (hopefully) neat and informative stats list as output. i.e. a WORTHWHILE courtesy list (what you give your opponent before a game so they know what you're putting on the table).

Been a bit challenging in place (not overly), but learned heaps for the effort. As a day to day programmer you typically work with only a certain subset of the language that you need. So side projects can really open your eyes as to other techniques or possibilities, even within your chosen language.

A side tangent thought about was the variation that this hobby allows;  painting, gaming, modelling, sculpting, printing, terrain stuff, list building, software stuff, even writing fiction. If you're bored of one aspect there are other options. Not sure if other hobbies allow this kind of scope.

Anyway, so apart from thinking a lot, what?


CoD
I made an expedition to the Padstow's Company of Dice (CoD) Club meet.
Was good, enough people to get the feel of a mini-cancon almost (sans stalls).

Not entirely a spur of the moment jaunt; following up about demoing some Epic for a couple of chaps.

Golden Thorn made her second public appearance. Rules were stated and some small games played. 

We covered most of the basic mechanics and overall the result was very positive. Explaining to experienced gamers is a massive leg up.

A few locals also checked it out and perhaps might be interested in joining in at some stage.

Generally positive, but given the difficultly creating a 'scene' that's as enthusiastic as i'll commit to.


Splurge
At some stage i succumbed to the consumer bug in my head and ordered another game mat. Which duly arrived - the day after my road trip. ha!

Neoprene and with a sturdy carry bag. It's pretty awesome. This was from battlefield-accessories (as per previous post re mdf buildings).   Am looking to perhaps get a green, grasslands version when they restock.
The camera and colour are doing their usual 'not quite right' thing, but suffice to say it's a 'badlands' colour scheme.
Difficult to get terrain that's going to fit everywhere.

Rolled some token dice and moved some token models around on it.
So now i have definitely enough terrain for two properly tricked out tables.
wunderbar!


And Finally... Coffee
I finally managed to get around to making some protection for the coffee trees. It's a 'not a greenhouse'.

Not pretty but 1st stage/attempt at it. The concept is to envelop the top of the tree to stop frost slamming the foliage while still allowing airflow etc.
Not as concerned about the overall temperature (hence 'not a greenhouse'); the leaves seem to really burn on those heatwave days and i'm gonna predict wilt readily from frosts.

I anticipate a rebuild in the medium future, and will take it off entirely during summer. The weather's at a stage where frost are a real possibility (hence my motivation and relief), to the point where i'm surprised not to have seen some.

Seems only a couple of weeks ago it was warm evenings and still light at 8pm. So it goes.


Until next time...